A bathroom that leaks six months after handover is not bad luck. It is a waterproofing layer that was skipped, rushed or detailed badly — and you only find out once the tiles are down.
Indian bathrooms take more water punishment than almost any room in the house: a health-faucet jet sprayed at the floor daily, a shower that soaks the walls, hard water, and months of monsoon humidity. This guide covers the eight mistakes Indian homes repeat, and the checks that catch them before tiling.
1. Why a brand-new bathroom leaks
Waterproofing is a system, not a product. A membrane does nothing if the surface under it is loose, the corners are square, the pipes are undressed and nobody tested it before tiling. Four parts must work together: a sound substrate, the right membrane, watertight detailing, and a flood test.
Leaks almost never start in the flat middle of the floor. They start at edges, holes and corners — the sunken slab, the wall-floor joint, a pipe hole, the drain, the door threshold. The first sign is usually elsewhere: a damp patch on the ceiling below, months after the leak started. These mistakes are cheap to prevent and ruinous to fix.
2. Mistake 1: trusting tiles and grout as the barrier
The most common mistake is the most understandable: the bathroom looks waterproof because the tiles are in and the grout lines are neat. They are not. Tiles are a wearing surface, grout is a filler — neither is a waterproof layer, and grout alone is not a substitute for a membrane underneath.
Water gets through hairline cracks in grout, the joints around the floor trap, and the gap where tile meets wall — every day. A membrane under the tiles catches that water and sends it to the drain. Without one, it goes into the slab and stays there. Before tiling, look at the floor: a membrane should be visible across the floor and up the walls. If the answer is "tiles hi waterproof hain", there is no waterproofing at all.
3. Mistake 2: laying the membrane on a bad surface
A membrane is only as good as its bond to the surface underneath. Laid over dust, loose cement or a cracked screed, it peels, blisters and lets water under it — sometimes within weeks. Surface preparation is half the job, and the half most often skipped, because nobody sees it once the membrane is on.
Before any coating, the slab should be clean, sound and dry: loose material brushed off, cracks filled. Run your hand over the floor before the first coat — if your palm comes away grey with dust, the surface is not ready.
4. Mistake 3: the sunken slab filled before it is waterproofed
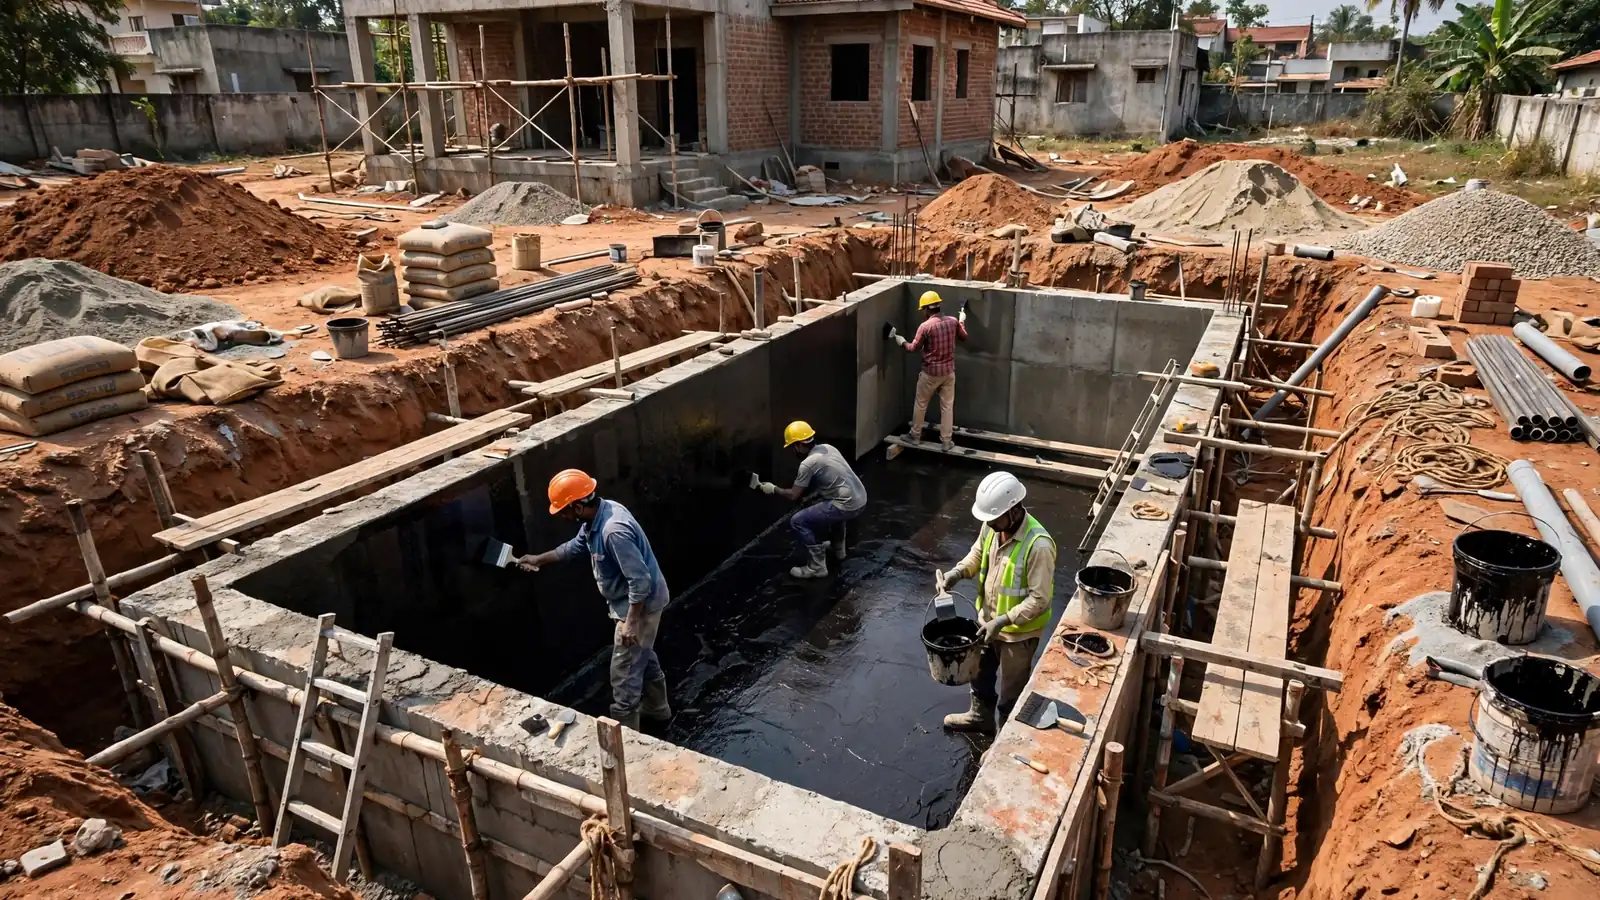
Most Indian bathrooms sit in a sunken slab — a portion of the floor dropped, typically 250–450 mm below the surrounding slab, so pipes and fill can sit below the finished floor. It is the most leak-prone part of an Indian bathroom, because once it is filled and tiled you can never see it again.
The mistake is filling the sunk portion before waterproofing it. The fill — usually brick bats or lightweight concrete — soaks up water like a sponge. If the slab and walls are not waterproofed first, the whole area becomes a hidden tank, seeping into the slab below while the bathroom above looks perfect. The sequence is fixed: waterproof the sunken slab and its side walls first, flood-test them, and only then fill. Our plumbing layout guide explains why the pipes inside a sunken slab must be tested before the fill goes in.
5. Mistake 4: square corners and a low upstand
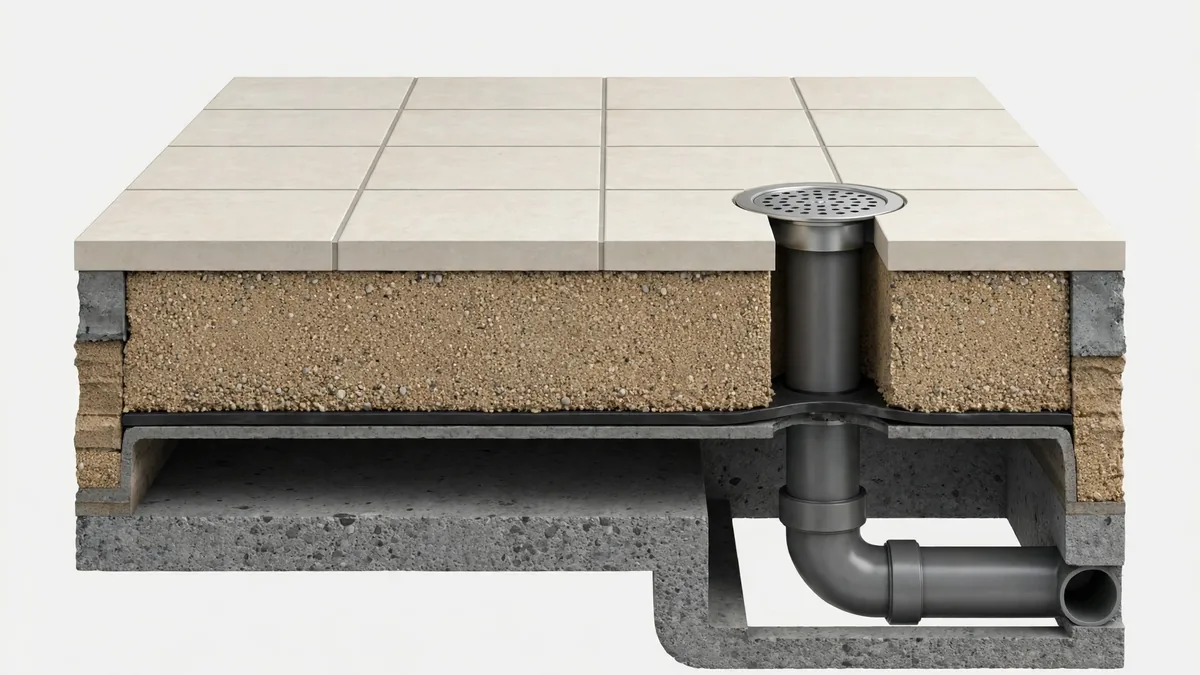
Where the floor meets the wall is the joint that moves, cracks and leaks first. A membrane painted into a hard 90° corner is a membrane waiting to crack: the corner flexes and the coating is thinnest exactly at the angle. The fix is a coving — a small rounded fillet of mortar along every wall-floor joint, so the membrane curves smoothly from floor to wall.
The second half is height. The membrane must turn up the wall at least 300 mm from the finished floor level, and higher in the shower. A bathroom waterproofed only to skirting height leaves its shower wall unprotected where the water hits it. Check the upstand with a tape: 300 mm minimum on dry walls, full height on shower walls.

6. Mistake 5: pipes and drains left undressed
Every hole in a bathroom floor is a leak waiting to happen. Supply pipes, waste pipes, trap and drain each punch through the membrane, and each needs a collar or fillet, with the membrane dressed tight to it.
The most common failure is at the floor trap and the drain. The membrane must be clamped or dressed into the drain body itself. If it stops at the edge of the drain hole, water runs under it and straight into the slab — and the drain becomes the leak. Before tiling, count the penetrations: a collar or fillet at each one, membrane wrapped tight, no bare concrete at any pipe edge. Moving a pipe after the membrane is on means cutting it, and a patched membrane is never as good as a continuous one.

7. Mistake 6: the wrong slope, so water pools
Even a perfect membrane fails if water never leaves the floor. A bathroom floor must fall gently towards the drain, so after a shower the water runs off instead of sitting in a puddle. A flat floor leaves standing water for hours — keeping the grout joints wet far longer than they were meant to be.
The check costs nothing: pour a bucket of water on the finished floor before handover. It should run to the drain in seconds. If it pools in a corner, the slope is wrong — and the fix is re-laying the floor, not more grout.
8. Mistake 7: skipping the flood test
The flood test is the one proof that the waterproofing works, and the step most often skipped — because it takes time, and because it can fail. Plug the drain, fill the floor with shallow water, mark the level, and leave it for 24 to 48 hours. Then check: has the level dropped, and is there dampness on the ceiling below?
A level that drops, or a damp patch below, means the membrane has a hole, a bad joint or a missed penetration — and it can still be fixed cheaply, because no tile has been laid yet. That is the whole point: the last moment when a failure is a day's work instead of a demolition. Insist on it in writing before tiling starts.

9. Mistake 8: the door threshold forgotten
A bathroom is a wet room, and a wet room needs a boundary. Without a raised threshold at the door, water from the shower and the health faucet runs out under it and into the passage — soaking the flooring outside.
The fix is a small raised threshold at the door, with the membrane turned up over it, so the bathroom holds its own water. Check it before tiling: a raised lip, membrane running over it. If the floor is flush with the passage, the water has a free path out.
10. What a proper bathroom waterproofing sequence looks like
Put the eight mistakes together and the correct sequence writes itself.
| Step | What happens | Check before moving on |
|---|---|---|
| 1. Prepare the slab | Clean, repair cracks, remove dust | Palm test — no dust |
| 2. Cove the corners | Rounded fillet at every wall-floor joint | No sharp 90° joint left |
| 3. Prime and coat | Primer, then two membrane coats | Continuous coat, no pinholes |
| 4. Turn up the walls | Membrane 300 mm up walls, higher in shower | Upstand measured |
| 5. Dress penetrations | Collars at pipes and drains | No bare concrete at pipes |
| 6. Flood-test | Pond water, wait 24–48 hours | Level steady, ceiling dry |
| 7. Fill and slope | Fill, screed to a fall to the drain | Bucket test — water runs to the drain |
| 8. Tile and grout | Tiles, then grout, then check joints | No pooling, threshold in place |
The sequence above is general good practice from the sources cited. Product, coats, curing time and flood-test duration must follow the manufacturer's data sheet — and any structural or plumbing change needs the project engineer.
11. What it costs — and what a leak costs later
Indicative rates from the 11 Nov BOQ research, re-checked 12 November 2026, run about ₹180–₹320 per sq ft of bathroom area. These are illustrative figures from web search results, not a quote: they move with the city, the membrane product and the slab condition, and exclude tiling. For a 40 sq ft bathroom that is roughly ₹7,200–₹12,800 — a small line in a house budget.
The repair, by contrast, is a demolition: break the tiles, remove the fill, re-waterproof, re-fill, re-tile and re-grout — plus the ceiling below. One brand source puts the saving at 2–20× the cost of doing it right the first time, and a well-applied system is expected to last 10–20 years.
12. How to check the work before the tiles go on
You do not need to be an engineer to catch these mistakes — you need to be on site before the tiles go on, while the waterproofing is visible. Five checks cover most of it.
1. Look at the floor. The membrane should be visible, continuous and even. 2. Measure the upstand. 300 mm minimum, higher in the shower; corners rounded. 3. Count the penetrations. Every pipe, trap and drain needs a collar and membrane tight around it. 4. Watch the flood test. Level marked, 24–48 hours, ceiling checked, result in writing. 5. Pour the bucket. After the screed, water should run straight to the drain.
Keep a written record of all five — a dated note, a photo of the membrane, the flood-test result. If a leak appears later, that record separates a warranty claim from an argument. Our handover checklist covers the bathroom checks for handover day.
13. First signs of a leak — and what to do
Leaks announce themselves late and somewhere else: a damp patch on the ceiling below, paint blistering next door, a musty smell, or tiles that sound hollow. In an apartment, the first complaint often comes from the neighbour below — by then the water has been travelling for weeks.
When you find one, find the source first — do not re-grout the visible tiles. A dye test in the drain or a plumber's check of the trap will point to the joint that failed. Re-grouting over a failed membrane lasts until the next monsoon.

If the bathroom is still under construction, stop the tiling and fix the membrane — a day's work. If it is finished, budget for a proper repair: break the tiles, re-waterproof, re-test, re-tile. When you sign a construction contract, make sure the waterproofing scope, the flood test and a defect-liability period are written in.
A bathroom that never leaks is not a lucky bathroom. It is one whose slab was prepared, whose corners were coved, whose pipes were dressed, and whose membrane was flood-tested before a single tile went on. None of those steps is expensive — and all are invisible once the tiles are down, which is why they must be checked while you can still see them. Building in Uttar Pradesh or Delhi NCR? Talk to the RTPL team about a bathroom scope with a written sequence, a flood test and a defect-liability period.
Last reviewed: 12 November 2026. All costs are illustrative figures from web search results, not a quote.